February 17, 2015

Brigadeiros: If you have to ask, you haven't lived


          I grew up eating these gooey chocolate treats from Rio de Janeiro where my brother and I were born. When friends came to visit the new baby, my parents would offer these traditional Brazilian truffles with a glass of champagne. Or so I was told. Given my modest claim to Brazilian heritage – my parents just happened to be stationed there – I love to find ways to relate to my samba-dancing, caipirinha-drinking origins wherever I can. This recipe for brigadeiros is a favorite among my friends, although they like my samba too.

(P.S. You can find this recipe and more of my food writing on www.insatiable-critic.com)

Brigadeiros
1 can sweetened condensed milk
1 Tbsp unsalted butter
1 1/2 oz semi-sweet chocolate chips
1 Tbsp heavy cream
1/2 Tbsp unsweetened cocoa powder
1 cup chocolate sprinkles

          In a pot, stir condensed milk, butter and cream over medium heat. Bring to a boil. Add chocolate chips and cocoa powder. Next, whisk the mixture until well combined. Reduce heat to low and whisk until mixture is thick and dense, about 15 minutes. Place mixture in a bowl and allow to cool for 30 minutes, then chill in the refrigerator for at least 4 hours.

          Once chilled, roll about a tablespoon of the chocolate into bite-sized balls and cover in chocolate sprinkles, chopped walnuts, chocolate shavings, get creative! Keep refrigerated, and serve in mini baking cups.

Makes about 25 brigadeiros.


October 12, 2014

Fan Club?


        It turns out in the 2 years now that I have heartlessly abandoned my blog, I have garnered a small following thanks to my beau's undercover PR skills. He tells me how he brags about my cooking to everyone but I didn't realize he had amassed a small fan club for me through friends he met at coin shows. 
        So I am there to say: 
Thank You.

        Thank you to T for always encouraging me and making me feel like what I have to write and cook and offer everyone is worth reading. For bragging to everyone you meets about the little things I do like they're big ones. For reminding me that I started this blog and I should never give up what I love just because I got 'busy' (let's be real here, lazy.) And for supporting me, encouraging me, and never once telling me I'm overdoing it when I set out to do what I imagined, even if I definitely am, it is overkill and I drive myself crazy getting it done. I love you, Cupcake, you inspired this blog and I'm here to keep it going!

        Thank you to those of you still reading this far, you're the ones I imagine when I picture people reading my thoughts, making my food and sharing it with your friends, impressing your friends with your newfound cooking skills and all around loving food for the same reasons I do; it brings people together and ignites the senses, there's no better drug than that. I'm blown away that people are still checking out this blog two years after I stopped posting recipes. The fact that you still care enough to use it as a source for your recipes makes me feel warm and fuzzy inside. There's no other way to describe it. Eat, drink and be happy, my darlings. I hope my recipes bring you the same joy and pride they bring me. 

A Little Update:
        For those of you I haven't updated in the last two years, let me be brief. I graduated college, moved to NYC to follow my man and my dreams of being a food writer, and got a job working for the iconic Gael Greene, Insatiable Critic. 
        In case you don't live and breathe food and cooking shows and food writers like myself, she's been a NYC food and restaurant critic for over 40 years. Its a roller coaster every week for sure but its been an eye opening experience. Working for Gael has allowed me to cover various food events and post a couple recipes on a platform I wouldn't otherwise have had the opportunity to. 
        So if you'd like to read a little bit of what I've been writing over the last year working for Gael, head on over to http://www.insatiable-critic.com/ and look me up! Or follow the snippets of my life in the city on my twitter account, @alopezeats

A Thank You Recipe: 
        Now the part you've all been waiting for and the part that is long overdue: a delicious recipe! I'm posting this one from a piece I wrote for Insatiable Critic, not because I cant be bothered to make another one but because I haven't taken any pictures of my most recent recipes and I want nothing but the best for my munchkins. But dont despair! This is a new one to the blog and just in time for the holidays. Read on to find the best cookies you've ever made!

Love, 
A


Cocoa Brown Butter Sea Salt Cookies

        I was escaping the relentless New York winter in sunny San Luis Obispo, CA. Taking advantage of the summery aura, we took a day trip to Cayucos, a small beach town overlooking the coast. 

        My brother’s girlfriend had insisted we find time to visit the Brown Butter Cookie Company.  A congenital connoisseur of edibles –- she had never led me astray. One bite and I was stunned.  And instantly in love with the soft, melt-in-your-mouth goodie. It was the cocoa flavor that wowed me. The others, original, citrus and coconut lime, were too tart for my sweet tooth. I bought a batch to bring home for my beau, but somehow they ended up in a hiding place only I knew about.


        When the last of the cookies were gone I was actually depressed. I could certainly go online and order but at $27 for two dozen plus shipping, I wouldn’t be able to maintain a serious cookie habit very long.

        Apparently I wasn’t the only fan fighting brown butter cookie withdrawal. Other sufferers offered instructions for their attempt to recreate the sensation at home. None of their recipes did the trick for me. After several false starts and half a dozen baking sessions, I got just what I craved:  a satiny, crumbling cocoa cookie with just the right amount of sweetness.  I’m sharing it with you.


Cocoa Brown Butter Sea Salt Cookies
Makes about 24 cookies

1 ½ sticks unsalted butter
¾ cup packed brown sugar
1 tsp vanilla extract
1 ½ cups all purpose flour
1 tsp baking soda
¼ cup cocoa powder
Fleur de sel sea salt for sprinkling

In a pan, melt butter until it browns. When you smell a nutty aroma, its ready.  Pour butter into a bowl and stir in brown sugar and vanilla.

In a separate bowl, whisk flour, baking soda and cocoa powder. Add dry ingredients to the butter mixture and combine.

Cool dough to room temperature and preheat oven to 325°. Line a cookie sheet with parchment paper. Next, using a tablespoon, form a ball and place cookies on pan. Sprinkle sea salt on each cookie and press down lightly. Be careful, as the cookies may break apart if you press down to hard. 

Bake cookies for 15 minutes. Do not overcook or the cookies will crumble. 


March 13, 2012

Blimey Buffalo

Being that I'm a lover of all things buffalo, I found this recipe over the summer and absolutely loved it. I would seriously recommend serving it fresh out of the oven so that the cheese sauce isn't completely absorbed by the pasta and is still a gooey cheesy buffalo-ey mess. You might also want to double up on the cheese sauce so you don't have this absorbing problem However, if you have leftovers they're still just as good, I like to garnish it with left over hot sauce. 


Buffalo Chicken Pasta
1 pound pasta (I use whatever is in the cabinet, macaroni worked pretty well)
2-3 chicken breasts, cooked and either cut into cubes or shredded (I like shredded)
1 tbsp butter
1 tbsp flour
1 1/2 cup milk
4 ounces grated monterey jack cheese, more for topping
1/3 cup sharp cheddar cheese, more for topping
1/3 buffalo wing sauce
Panko bread crumbs
1/3 cup chopped green onions for topping (optional)


Preheat oven to 375 degrees
Cook pasta as instructions say on package
For cheese sauce, I am using the original measurements but I would recommend doubling it for a saucier dish.
While you're waiting on the pasta to cook, melt your butter in a saucepan over medium heat. When butter begins to bubble, add flour and mix to create a roux (or the base for your sauce) and cook for 1-2 minutes until golden brown. DO NOT let it get much darker, if it does, start over or your sauce will be all grainy and weird. At this point add the milk and turn the heat down to low while you mix, thickening the milk. Next, add the grated cheeses and stir until they've melted and sauce is smooth. Finally stir in buffalo sauce. Add salt and pepper to taste.
Spray 9x13 baking dish with PAM. Add pasta and chicken to baking dish and pour sauce on top, then mix everything together until well combined. Sprinkle Panko crumbs on top then grated cheeses. I like to make a layer on top for a crunchy crust, so be generous. Bake for 25 minutes and top with green onions and hot sauce when serving. Enjoy!

February 19, 2012

Nuts for Nutella


In this next installment of the Nutella-holics series I bring you with great joy the Nutella filled cookie. That's right. Its a chocolate overload that you won't be able to stop munching on. Especially when they're fresh out of the oven. Which is how half my batch disappeared within half an hour of making them. There really isn't much more that I can say aside from GO MAKE THESE ASAP. Enjoy!


Chocolate Nutella Filled Cookies
1 cup butter (room temp, will be much easier to cream with sugar this way)
1¼ cup sugar
2 large eggs
½ cup unsweetened cocoa powder
2¼ cups all-purpose flour
¼ tsp salt
1 tsp baking powder
1½ cups large semi-sweet chocolate chips
Nutella for filling (have a backup jar, I used way more than expected)


Preheat oven to 350 degrees.


First off, according to the original recipe, you're supposed to use a mixer to cream everything together but with a lot of fast whisking and enlisting help from my taste testers' mixing arms I managed to do just fine without one and yield the same results. 
So, first cream together the butter and sugar until fluffy. Mix in eggs slowly and once those are incorporated and fluffy, slowly (and I mean slowly) mix in the cocoa powder. If you whip it around too fast you'll be fortunate enough to get a burst of cocoa powder to the face, which I did.
Next mix in the flour, salt and baking powder and once its blended add the chocolate chips. At this point it's going to be hard to mix by hand so put some muscle into it, don't be lazy or not all your cookies will have chocolate chips in them. 
Now, here comes the delicious Nutella part. There are two ways to put the cookies together and I found the original version to be much easier. One way is to take about 2 tablespoons in your hand and flatten it out then put a small dollop of Nutella in the center, then take the edges and fold them up and pinch them together to create a little capsule and place on a prepared baking sheet. This way worked best for me, and just to avoid getting the dough stuck to my hands I rubbed some flour into my hands every once in a while.
The other way is to take about 1 tablespoon of the dough and flatten it, then put the Nutella on top and place another piece of dough on top and pinch the sides together. I found this to be kind of messy when the Nutella would ooze out the sides, but your choice. 
Once you've got all your Nutella filled cookies set out (giving them about at least an inch or two between each other to spread out, stick them in the oven for about 13-16 minutes, though no more than that or else they wont be gooey inside. 

I would highly recommend that you serve them warm with a class of cold milk as my scavengers did for a late night snack. 
Finger Lickin' Good

February 15, 2012

Spanish Homage


I have reached over 1,000 views!!!! What better way to celebrate than give you one of my all time classics, Tortilla EspaƱola or Spanish Tortilla. 


Although not an exact replica of what Spaniards might be used to, I've altered it over the years to suit my kitchen availability and turned it into more of a casserole although preferably I would use a spring form pan and slice it like a pie. 
This dish is primarily egg and potato based with some seasoning and as I like it, chorizo, or spicy sausage. I've been making this recipe since my mom first tried it out when I was in high school and I was addicted. Then I began experimenting with it and rarely ever had it fail on me. 
What I love about this recipe is that its very easy to personalize for the crowd you are serving, depending on their likes, and works great as either a side dish, breakfast dish, or even your main dish. It might not be the most healthy thing I've ever put up here but oh my is it tasty and it wins over any crowd.


Tortilla EspaƱola- Spanish Tortilla
Depending on your cookware makes 8-12 servings
*Can be made with sweet or normal potatoes


3-4 large normal or sweet potatoes 
4-6 eggs (depending on how eggy you like it may be more, I've used up to 7 or 8)
1 cup grated Parmesan cheese
1-2 cloves garlic, diced
1 Chorizo Sartra Picante (spicy Spanish sausage, spicy Italian works just as well, but its not as dry)
herbs and seasonings of choice (rosemary, parsley, basil, paprika, cumin, salt, pepper) I use lots!


Slice potatoes into bite sized cubes, about equally sized so they all cook evenly; slice sausage into small pieces. In a medium bowl, mix the grated cheese, eggs, garlic, and seasoning. Beat well. 
Using no cooking oil, cook the sausage in a large pan (the oil from the sausage will be left in the pan to cook the potatoes). Set sausage aside in separate bowl, keeping the oil in the pan! Add the potatoes to the pan and saute until they are just under cooked (they'll finish cooking in the oven)
Preheat oven to 350 degrees.
While the oven heats up, make a little crater in the potato pan and add the sausage. Then pour the egg mixture on top and slowly mix making sure to incorporate everything together. Be careful however to let egg cook on the bottom of the pan, otherwise it wont make a coat the potato and sausage. 
Pour mixture into a sprayed springpan or casserole dish and pat down evenly. Put in oven for about 30-45 minutes or until potatoes are cooked through. Serve warm. Enjoy!

December 13, 2011

Cooking In A Powdered Sugar Wonderland...


It's that time of year, and I know I haven't been the most avid blogger the last few months but lucky you because I will reciprocate by treating you with my all-time favorite Christmas 'cookie' recipe, compliments of my mom's holiday recipe stash. She's been making these for as long as I can remember and making them always puts me in the holiday spirit. The last two years I've made them, they were a huge hit so here is my holiday gift to you. 


Rum Balls
2 1/2 cups vanilla wafer crumbs (buy them whole and crush them) 
2 Tablespoons powdered cocoa 
3 Tablespoons white corn syrup 
1 Cup powdered sugar 
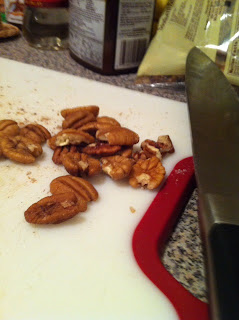
1 Cup chopped nuts (pecans work best) 
1/4  - 1/2 Cup rum (to taste) 
Powdered sugar for rolling 

Combine vanilla wafer crumbs, cocoa, corn syrup and sugar and mix well. Add nuts and rum and mix well. Shape into bite-size balls and roll in confectioners sugar. No cooking required. Keep in an air-tight container in the refrigerator. 


August 20, 2011

Chicken Of The Yogurt Variation


When I think of yogurt, I think of a sweet, creamy breakfast alternative. Personally, I'm not a huge fan, though a plain Spanish yogurt with a tarty end note is always delightful, but so hard to find just right. Call me picky, but I'm a spoiled eater. So when I found this recipe for Yogurt Chicken, I was kind of surprised. I don't really consider yogurt much of a chicken topping but i could just see how good it tasted through the pictures. And if I've learned anything from recipe hunting, when a recipe speaks to you, make it. 


I've had this recipe in the back of my mind for a while now, and when I was stumped for what to make for dinner the other night, chicken seemed simple enough, maybe even a little too simple. Which was when this recipe popped into the front lines of my hunger stricken mind screaming, "Oh me! Pick me!" I knew what I had to do.
So one trip to the grocery store and one minor (but I felt vital) recipe change later, I was eating this very straightforward meal, and it was fantastic. The easy to make yogurt concoction managed to infuse the chicken and keep it juicy and succulent while still keeping the breading crispy and golden. Its quick to make and simple to bake, so give it a try and see for yourselves!


Yogurt Chicken
Plain, unflavored yogurt (1 or 2 containers, depending on how much chicken you want to make)
Chicken (I used chicken breasts/strips)
Garlic (minced, to taste)
Parsley minced (fresh is good, but I just used dried) 
Lemon Juice
Salt
Crushed Corn Flakes (bread crumbs work too, but I think the corn flakes give it added flavor)


In a bowl, add yogurt, parsley and garlic and mix well. Now add lemon juice, about one lemon should do the trick. Mix.After cleaning your chicken, salt it lightly.In another bowl, add crushed cornflakes. 
One at a time, put your chicken into the yogurt first, covering it thoroughly. Then lay it in the cornflakes bowl and cover well. 
Place on a sprayed baking sheet and bake at 350 degrees for an hour. 
I should point out that putting a little slab of butter on each piece before it goes into the oven is good if you're using breadcrumbs or Panko as it dries out, but with cornflakes, it just made them a little soggy on the bottom.
Enjoy!